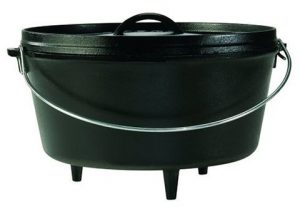
 A camp Dutch oven is a Dutch oven with legs and a flanged lid. The legs elevate the oven to allow coals to be placed below it and the flange prevents coals from sliding off of the lid. Check out Dutch Oven History for a short history and description of Dutch ovens including the camp Dutch oven.
As with other Dutch ovens (those without legs and a flanged lid), camp Dutch ovens come in various sizes and depths. Likely the most common size is a 12-inch diameter oven; 12-inch refers to the diameter of top of the oven. Generally, recipes that call for a 9” x 13” pan convert well to a 12-inch Dutch oven.
Camp Dutch ovens can be used to cook over a camp fire or hot coals. You can cook anything in a camp Dutch oven that you can cook in your oven at home. The key to successful cooking in a camp Dutch oven is being able to control the temperature inside the oven. There are a couple of ways that camp Dutch oven cooks control the oven temperature.
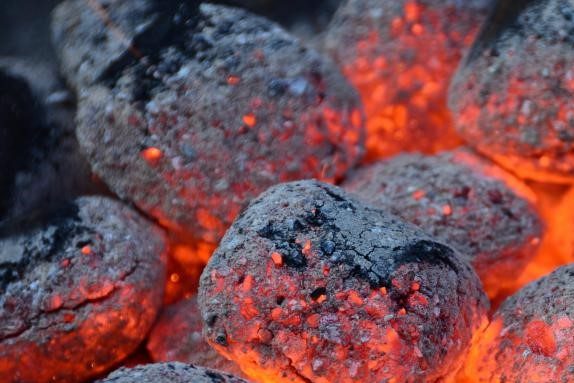
One way is to suspend the oven over a fire or hot coals and place hot coals on the lid. The temperature is determined by the amount of coals on the lid and the height of the oven above the fire.
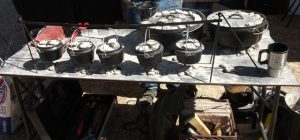 The other way to control the oven temperature is to use charcoal briquettes. The camp Dutch oven is placed on a cook table. Hot charcoal briquettes are placed below the oven and on the lid.
Charcoal briquettes emit a specific amount of heat so that the temperature inside the oven can be controlled fairly accurately by managing the number of briquettes used. This is the way Robin and I cook in our camp Dutch ovens. There is good information on this method at Temperature Control.
What to Look for in a Camp Dutch Oven
Camp Dutch Ovens are made from cast iron or aluminum. There are advantages of both. Aluminum is much lighter and it doesn’t rust. Cast iron retains heat longer than aluminum and distributes that heat evenly with less potential for hot spots. I’ve only cooked in cast iron.
T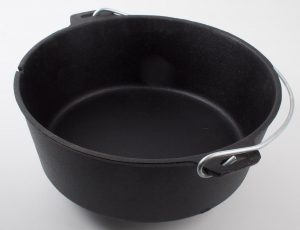 he quality of a Dutch oven can be judged by the smoothness of the finish. Ovens that have a smooth surface with no pitting tend to be high quality ovens. New Dutch ovens that have a pitted surface are poor quality ovens that should be avoided. Lodge and Camp Chef are two brands that are regarded as having good quality products, but other quality brands are available.
It is best if the lid has a loop handle so that it can be lifted using a lid lifter. Make sure the lid fits snugly onto the oven; loose fitting lids are an indication of poor quality and can adversely affect the oven’s performance.
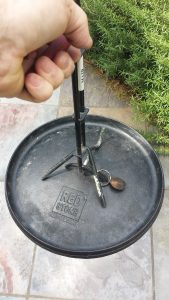 Camp Dutch ovens have a bale (handle) that can be moved out of the way so that the lid can be lifted without contacting the bale. Spring handle bales generally interfere with the lid, but the spring can be removed. Typically, each end of the spring is spot-welded to the bale. The spot welds can be cut and the spring can then be slid off of the handle.
Cast iron Dutch ovens must be seasoned to guard against rusting. Seasoning refers to a coating that forms on the oven surface when the oven is lightly coated with oil that is then baked onto the surface. Also, food cooked in a well-seasoned Dutch oven will have less tendency to stick to the oven. Many cast iron Dutch ovens sold today come seasoned. If properly seasoned, the surface of a quality Dutch oven will have a uniform black color and the finish will be uniformly smooth over 100 percent of the surface.
Maintaining Your Camp Dutch Oven
Well-seasoned Dutch ovens can be cleaned with hot water and wiped with a soft cloth or quality paper towel (one that doesn’t leave lint). Cleaning a Dutch oven in this manner will help maintain and may improve the seasoning over time.
If the oven is not used regularly, any oil left on the surface of the oven will become rancid. You should always sniff your Dutch oven before cooking to ensure it doesn’t smell rancid. Any rancid smell must be removed before cooking in the oven or the food will taste rancid. If your Dutch oven smells rancid, spray some apple cider vinegar in it and wipe it out with a clean cloth or quality paper towel. Continue doing this until the rancid smell is gone then rinse with clean water. This will remove the rancid oil on the surface and will likely remove a little of the seasoning.
If the seasoning wears off you will notice the color of the oven changing from black to cast iron gray. The oven and lid can be re-seasoned by coating it with a very thin layer of vegetable oil and baking it in an oven or gas grill for 45 minutes to an hour at 350 to 375 degrees F (175 to 190 degrees C). Make sure to use a very thin coating of oil; too much oil will result in sticky seasoning. And take care not to bake it at a higher temperature than 375 degrees F (190 degrees C) as this can burn off the seasoning. Repeat this process until the oven regains its black appearance over 100 percent of its surface.
Store your Dutch oven in a dry place only after it has been properly cleaned and dried. When storing it for an extended period, it should be well seasoned to guard against rusting. The lid should be vented to allow air circulation in the oven. This will help to limit any rancid smell. If you store the oven in a tote bag,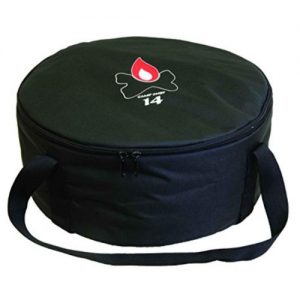 put the oven lid on the bottom and set the oven on the lid. This will protect the bottom of the bag from potential damage from the oven legs and allow air circulation in the oven. Storing your camp Dutch oven in a tote bag will protect it and make it easy to transport. There are several camp Dutch oven tote bag manufacturers. I’ve shopped around and found good prices here Tote Bag.